This guide shows you how to install Spring Tool Suite in Eclipse
STS stands for Spring Tool Suite. It provides ready-to-use environment to implement, run, debug and deploy Spring application with Eclipse IDE. It is a powerful environment which will help you make Spring development faster and easier.
How to Install Spring Tool Suite in Eclipse
1. Open your Eclipse IDE
2. Go to “Help” and select “Eclipse Marketplace…”
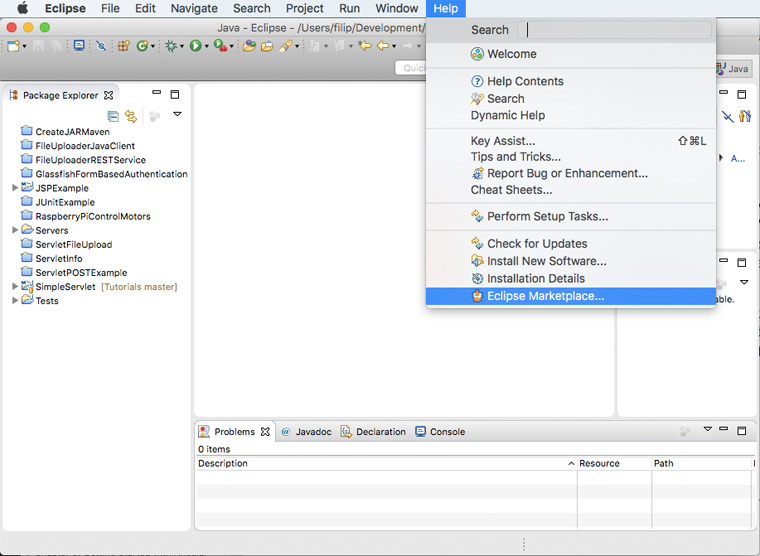
Eclipse open marketplace
3. In Eclipse Marketplace window type “Spring STS” in “Find:” field and click the “Go” button
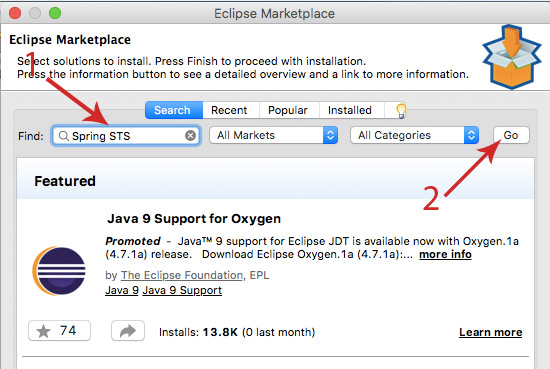
Search for Spring STS
4. In the list find “Spring Tool Suite” and click the “Install” button. The most current version in time of writing this guide is 3.8.4.RELEASE

Install Spring Tool Suite
5. On the next screen select desired features and press the “Confirm” button
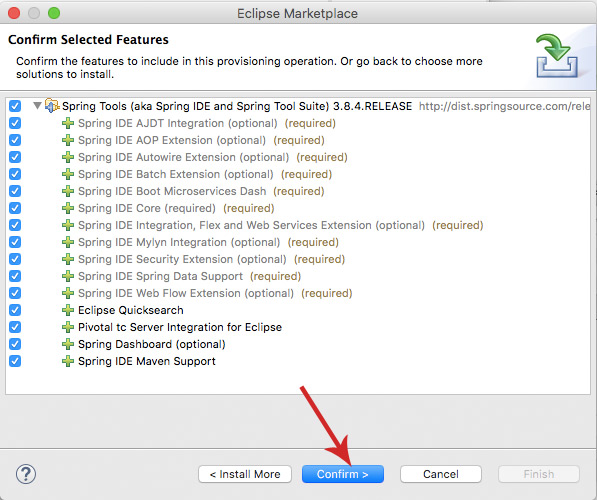
STS features selection
6. Accept terms and license agreements
7. Wait for the software to be installed
8. After installation is done you will be prompted to restart Eclipse for the changes to take effect
Confirm Successful Installation
If the installation goes well and you have selected “Dashboard” in the features list (see step 5) you will see a new icon in your Eclipse tool-bar
Spring dashboard icon in toolbar
You can also may want to create a simple App to test if everything is configured fine. Read our my next tutorial to learn how to create a simple app with Spring and STS