In this tutorial I will show you how to simplify your Java programming with Eclipse IDE.
What is Eclipse IDE
IDE stands for Integrated Development Environment. In other words Eclipse is powerful and advanced text editor with a lot of plug-ins and tools. With Eclipse you can write your java programs much faster and execute them with a push of a button. But Eclipse is much more. The plug-in architecture gives you the ability to constantly add the development tools you need.
You can always compile and run your programs “the old-fashioned way”. For more details read our previous tutorial Simple Java Example. But if you want to code like a pro you have to learn how to use an industry standard IDE such as Eclipse.
Installing Eclipse
Installing eclipse is easy and straightforward. If you don’t have Java JDK installed on your computer already, please install it now. You can find more details about installing java in this tutorial Simple Java Example.
Now go to http://eclipse.org/downloads/ . Locate “Eclipse IDE for Java Developers”. You must download the Eclipse version corresponding to your Java version. For example if you have installed Java x64 Bit, than take the Eclipse x64 Bit and the x32 Bit version otherwise.
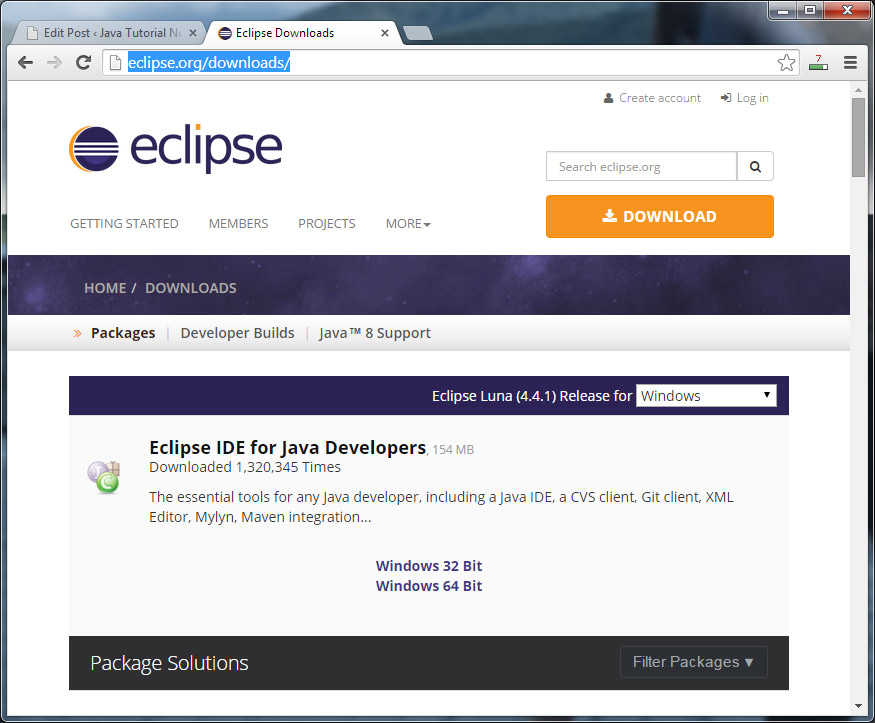
You will download a .zip file for Windows or tar.gz for your MacOS or Linux operating system.
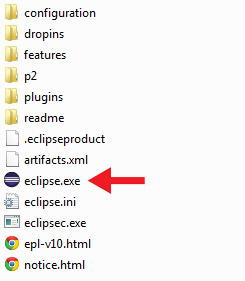
Once the download is finished just unzip the file on your hard-drive. Open the unzipped folder and start the executable file. For Windows it is eclipse.exe
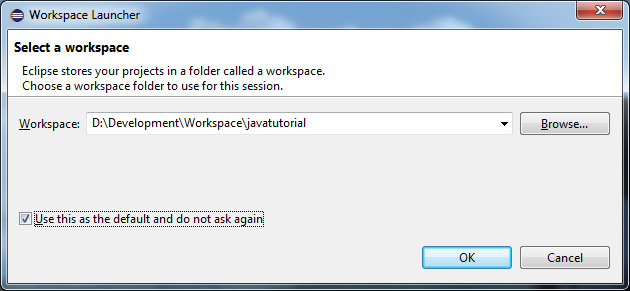
Now you have to choose a Workspace for your projects. A Workspace is a folders on your hard-drive where Eclipse stores your java projects. I will use D:\Development\Workspace\javatutorial as main folder for all my tutorial projects and examples.
So that’s it! You have successfully installed Eclipse. You will see a welcome screen with links to guides and help materials. You may reed some of them or just close this screen for now.
Creating Java Project with Eclipse
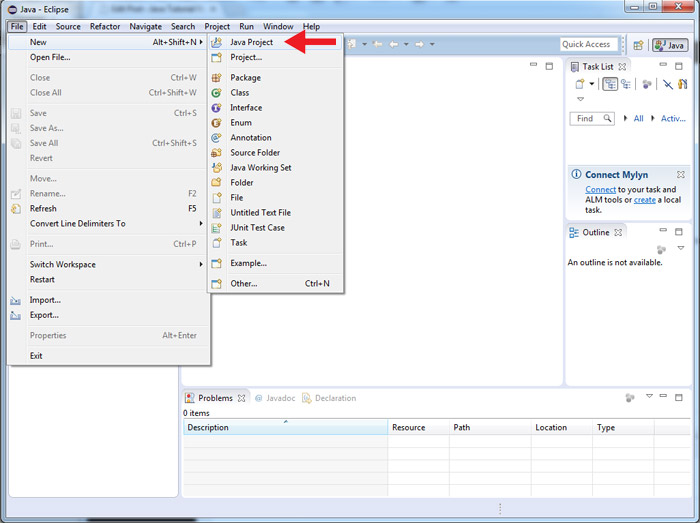
Java code is organized in projects in Eclipse. So lets start with our first project. Click on File -> New -> Java Project
In the next screen give your project a name. I will use “FirstEclipseProject” for this tutorial.
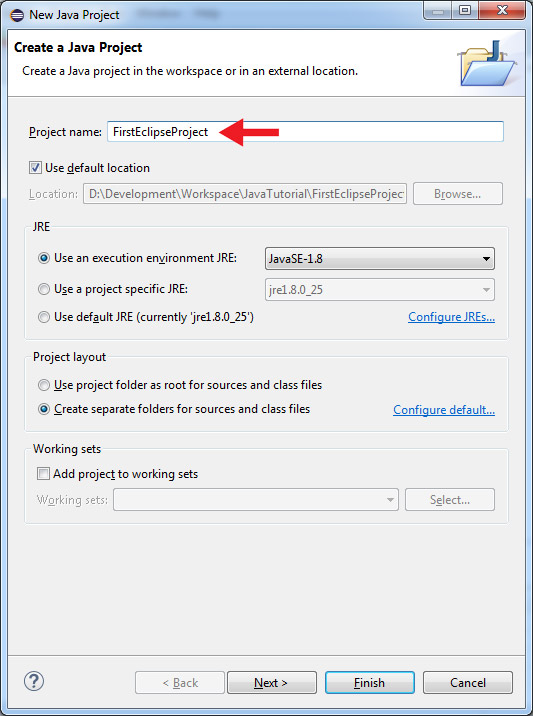
Click on “Finish” button. Eclipse will create the structure of the project for you. Now you will see your new project in Package Explorer on the left of your screen
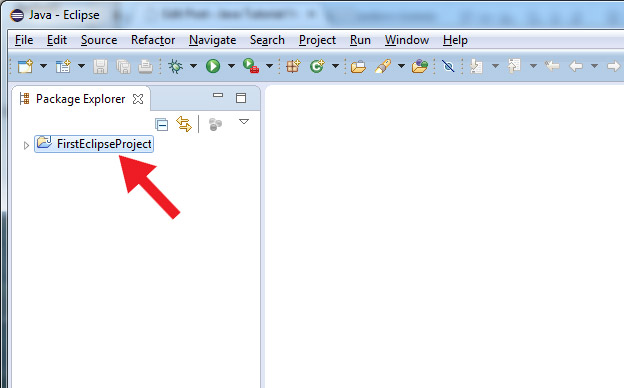
Expand the project.
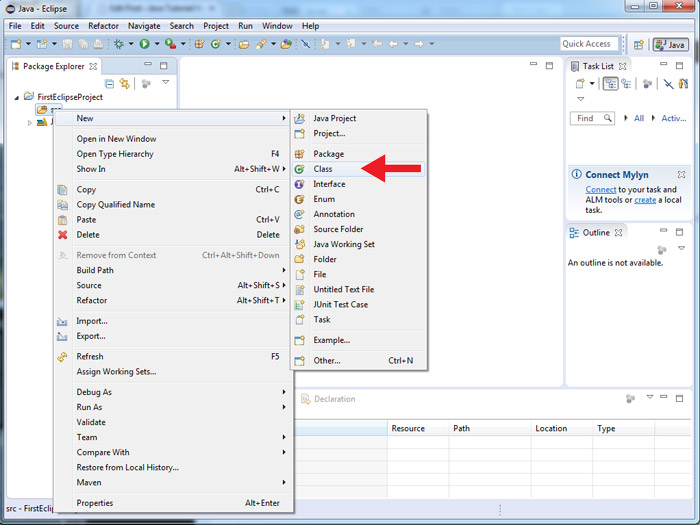
Right click on the “src” folder than go to New -> Class
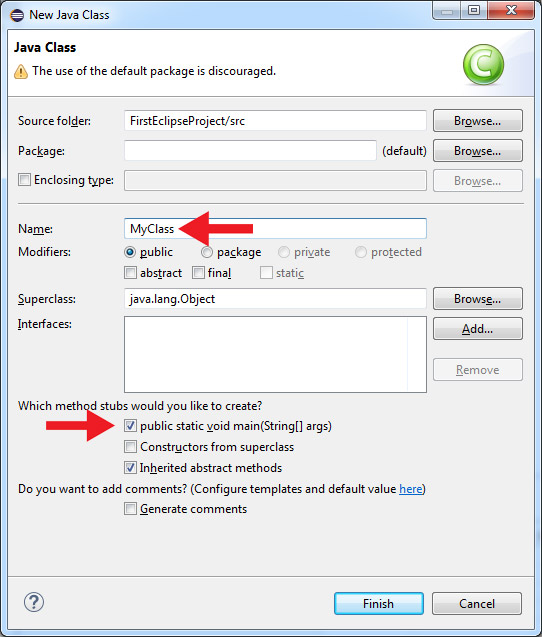
In the next screen enter a name for the new Java class. I will use “MyClass” as a name for this tutorial. I will also check the box “public static void main(String[] args)” to let Eclipse create a main method for me.
Eclipse has created a new class for us with a main method. Now replace
// TODO Auto-generated method stub
with
System.out.println("Programming with Eclipse is easy!");
Your complete code should look like this:
public class MyClass {
	public static void main(String[] args) {
		System.out.println("Programming with Eclipse is easy!");
	}
}
Save your work. Right click “MyClass.java” in Package Explorer than -> Run As -> Java Application

And voila … in console tab you should see the result of your program

That’s it! I told you it will be easy and fun 🙂
In our next tutorial I will show you how to use shortcuts and key combinations in Eclipse.