What is software testing and why is it useful?
Testing software in the simplest terms is to evaluate whether it meets all the requirements or not and to also inspect if there are any misbehaviors and bugs associated with its currents state.

Testing in Java
Java has multiple testing frameworks available, however, in this tutorial, we will focus on JUnit as this is one of the most popular ones.
A bit about JUnit
JUnit is a Java framework and it allows us to write and run automated tests. With the latest updates of the framework, the readability of JUnits has increased significantly.
Setting up JUnit
If you are using a common IDE such as Eclipse, IntelliJ or NetBeans, JUnit will already be installed by default. If you are not using an IDE but use only Maven or Gradle, then you will need to install it in the pom.xml or build. gradle file.
If you create a Maven project in Eclipse and select archetype-quickstart and navigate to the pom.xml file, you will see that automatically, Eclipse added JUnit as a dependency.
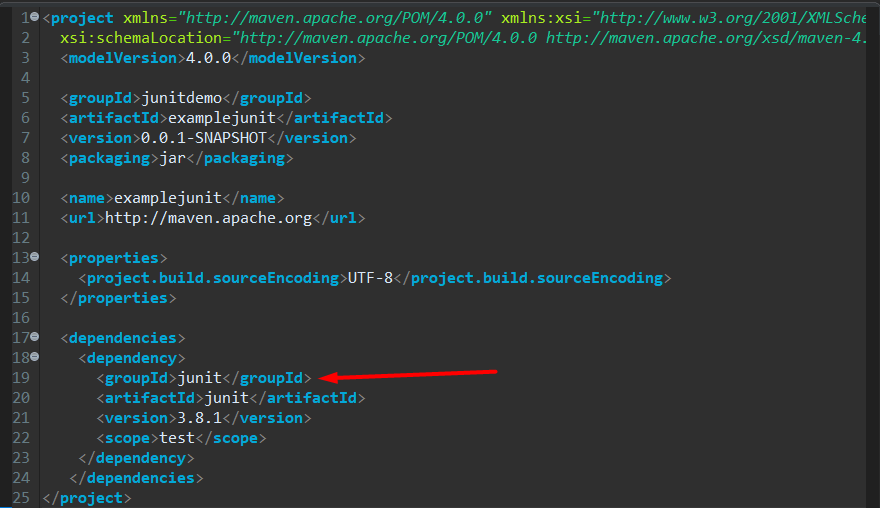
However, the version is 3.8.1. We don’t want that, we either want JUnit 4 or JUni5.
JUnit 4
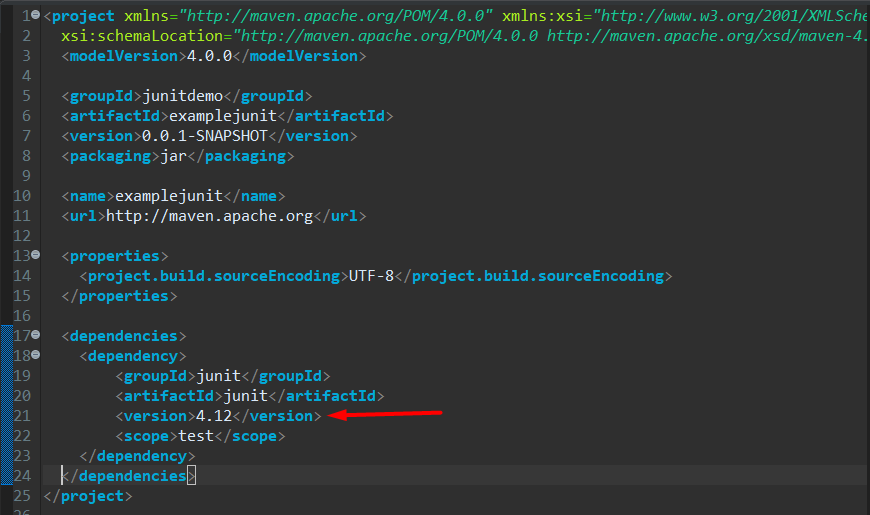
So let’s remove the default version and replace it with a newer version, like so:
After we have added it as a dependency, however, and it doesn’t recognize the org.junit, do the following:
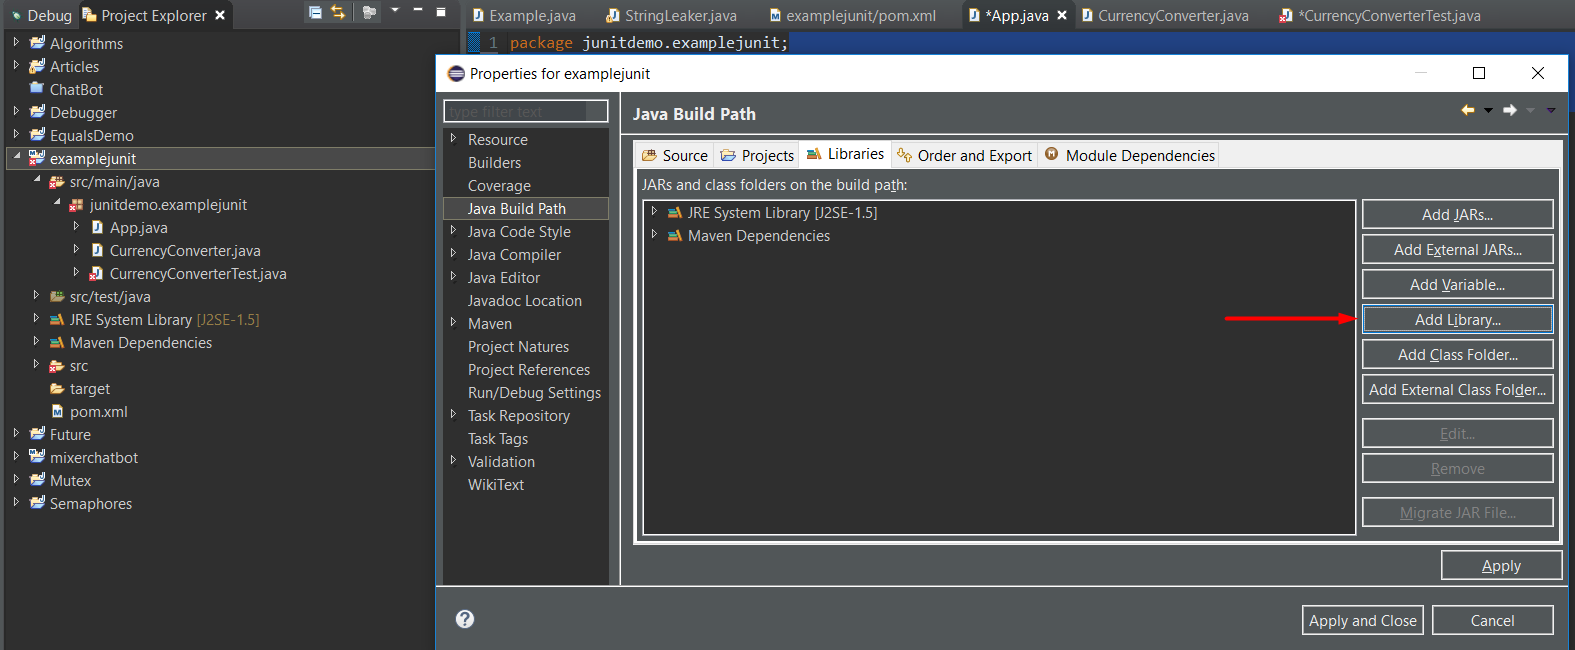
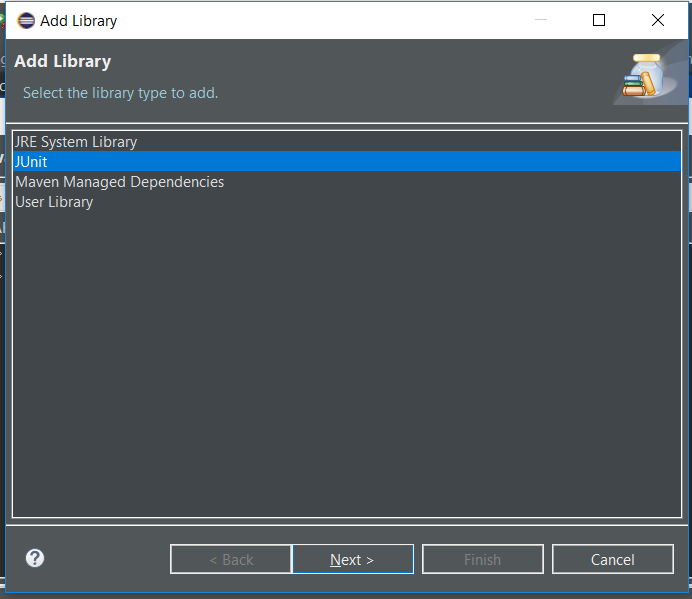
In eclipse:
Properties->Java Build Path->Libraries->Add Library->JUnit
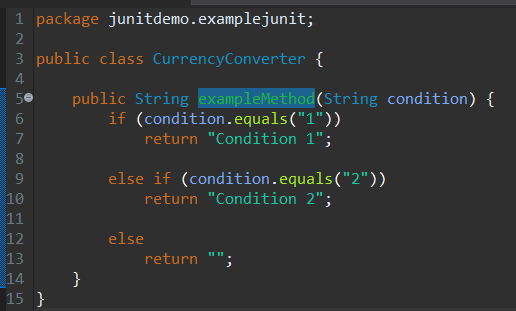
How to use JUnit example
This will be my simple program that we will be running JUnit tests on:
My Test class
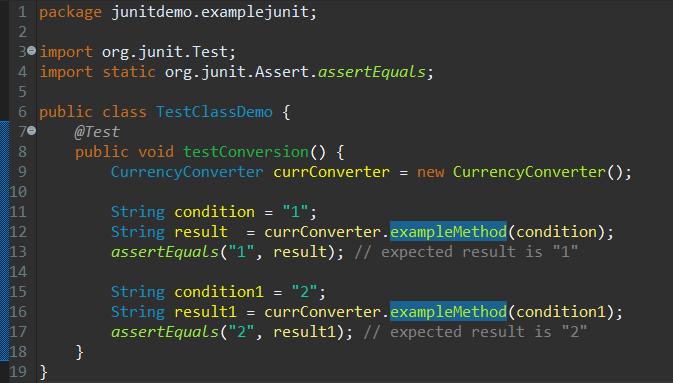
That’s it! We just ran 2 tests on the exampeMethod method.
Breakdown
Notice that the method testConversion() is annotated with the JUnit @Test annotation. This is done so the unit test runner knows that this method represents a unit test and should be executed. If it didn’t have this annotation, it wouldn’t have been represented as a Test class and furthermore, wouldn’t be run by the test runner.
assertEquals() is the method that does the actual testing. What you really care about is line 13 and 17. The assertEquals() method takes two arguments, the first argument is the expected result and the second argument is the actual result. You can see how this is very useful and very easy to implement.
It is important to point out that if the expected result does match the real result, nothing happens, however, if they do not match, assertEquals throws an exception and the test method stops further execution.
You can have as many test methods as you would like.
Running a JUnit
Run in Eclipse
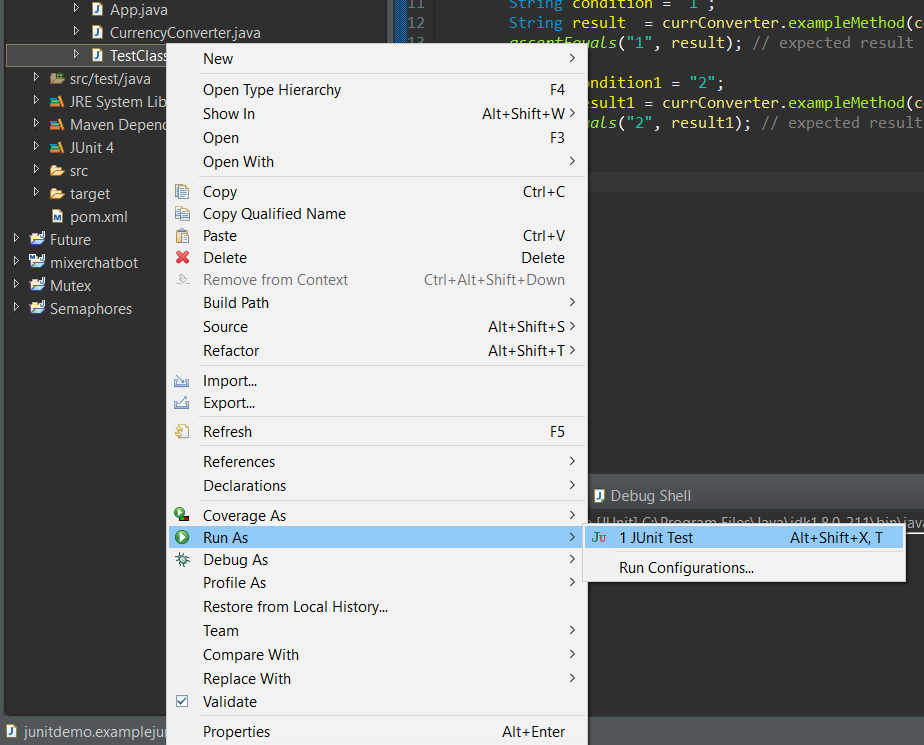
In eclipse, on the Package Explorer, locate the JUnit test, right-click and then select Run As -> JUnit Test.
Run in Maven
If you want to run JUnit using Maven, you can either run an entire test suite using mvn test or to run a specific test: mvn -Dtest=TestName test.
Run in Gradle
In gradle, for an entire test suite: gradlew test, for a specific test: gradlew -Dtest.single=testName test.