This tutorial explains how to create a simple Android app in Android Studio.
Creating app in Android Studio is very easy. Before starting actual programming make sure you have set your environment and Android SDK path properly. You can follow the steps in this tutorial to do this. Let’s start from the scratch.
Creating the Android project
Create a new project.
- Go to File menu => New and then select New Project.
- Enter Application name and select project’s location. Click Next.(Application name will be shown as top banner on your app).
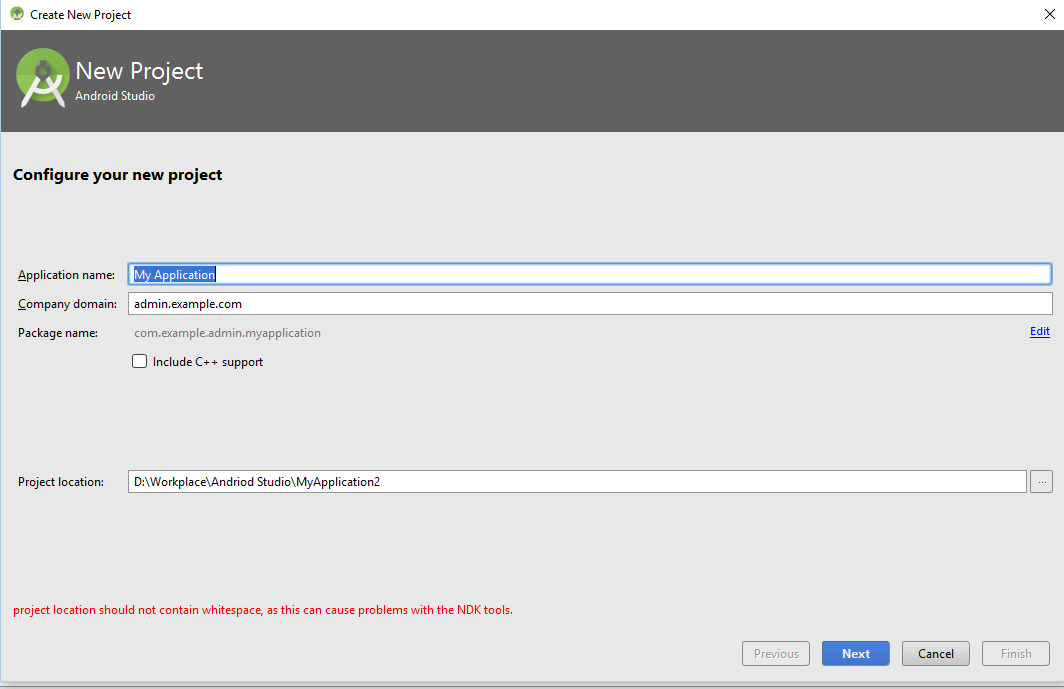
Step 1: New Application
- Select Target device for your project and click Next.
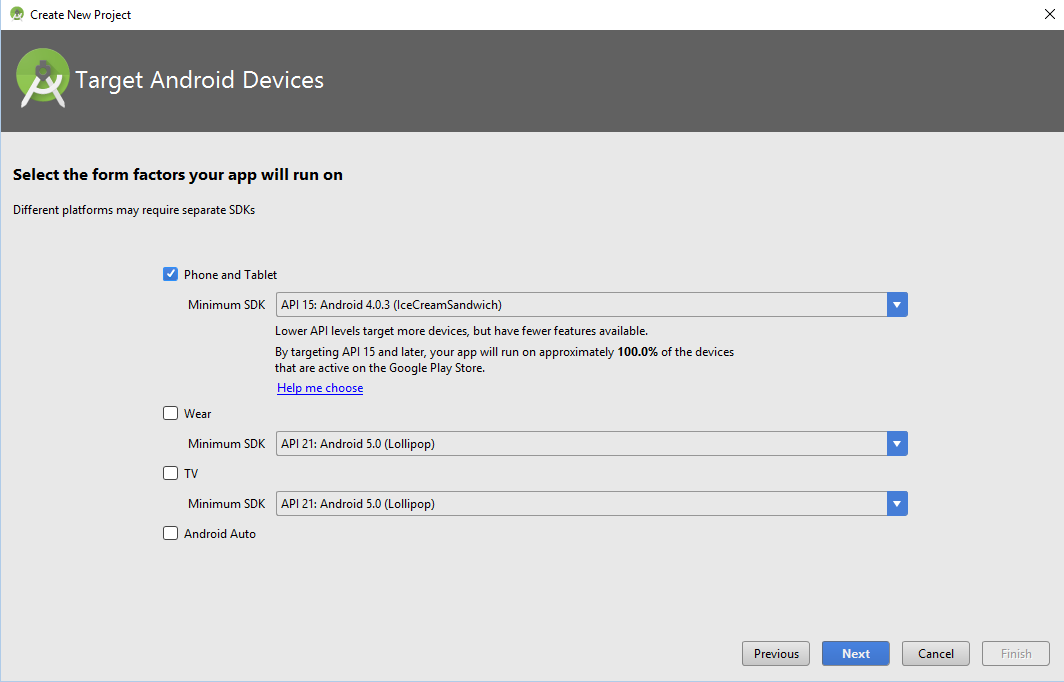
Step 2: Target Android Device
- Then select an activity for your project. As this is basic tutorial so I am selecting an empty activity.
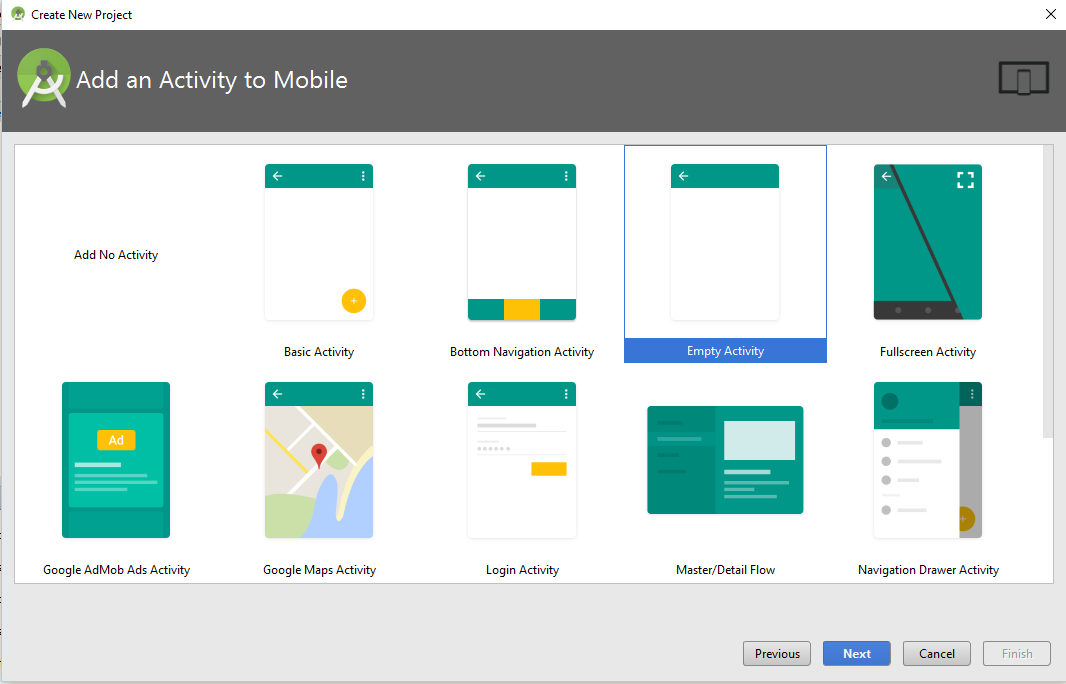
Step 3: Add activity
- Next step is to name activity and layout for activity. (Activity is java class where you will do all coding while layout is the design in xml format).
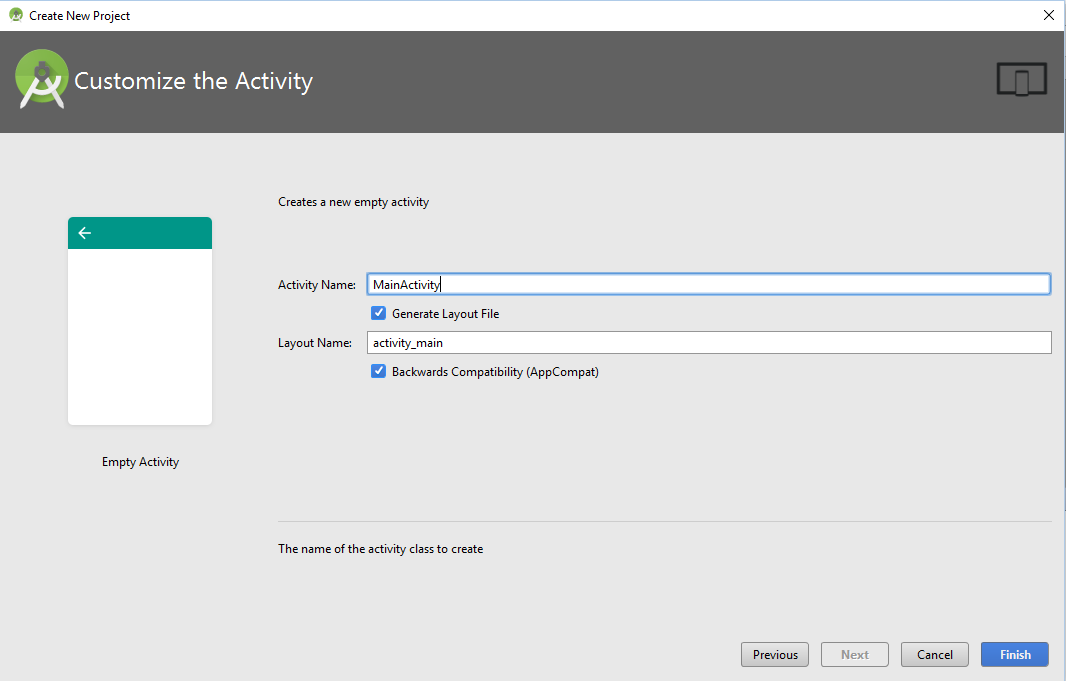
Step 4: Customize activity
- Click Finish.
- This is how an empty activity looks like
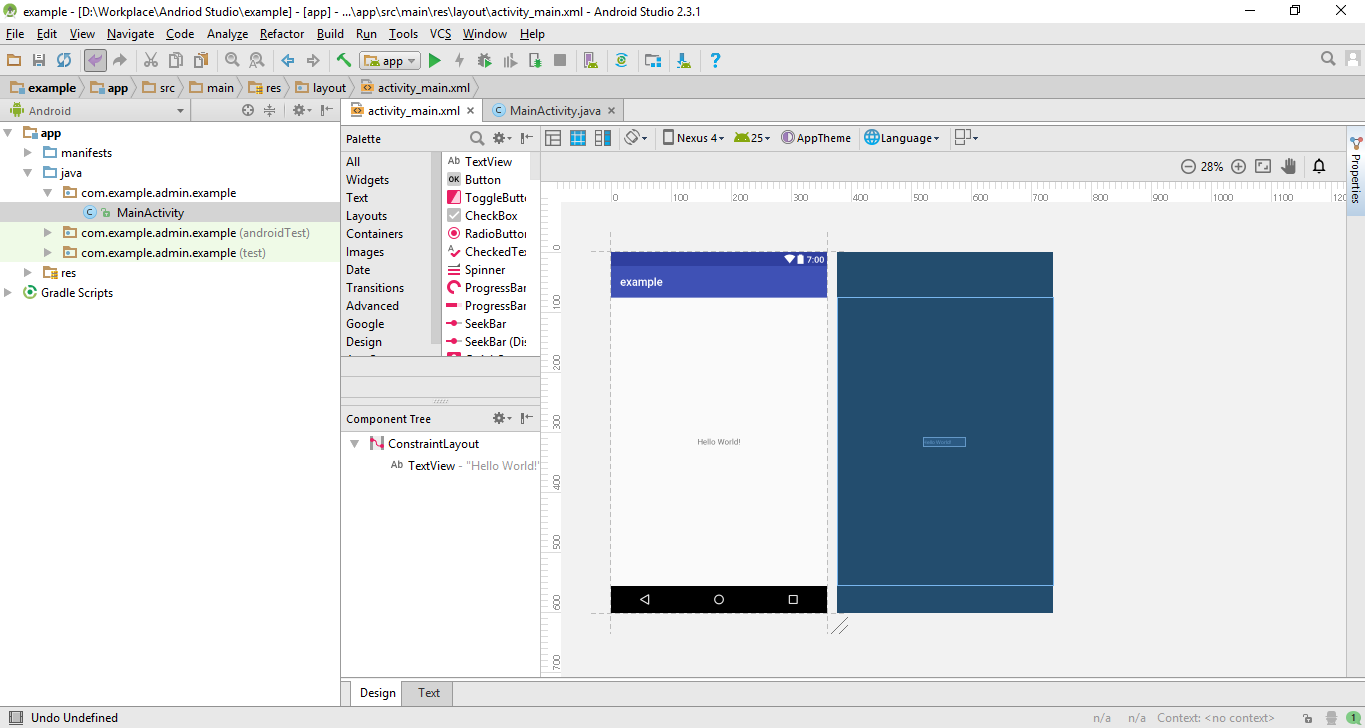
Project screen
Project’s hierarchy
First of all explore your app’s hierarchy
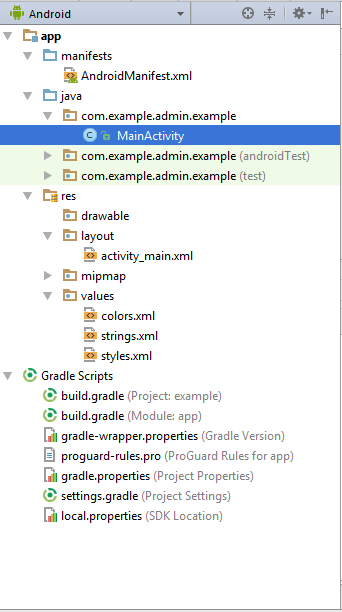
Project Hierarchy
- xml: It defines properties of app.
- Layout: Layout folder contains all layout files, used to design shape and look of app.
- Values: This folder contains other xml files such as strings.xml, styles.xml and colors.xml. These resource files are useful in project’s code and style.
- Java: This folder contains all java classes.
- gradle: It contains SDKversion, applicationId and BuilToolVersion.
Now let’s come to coding.
Create design
Open your layout file and click on the Design view.
Drag a textview from the Palette window onto the screen. Click on the Textview and you can change its properties like font size, font color in the properties window.
Similarly drag a text field and a button also and arrange them. Set their properties so the screen looks like this.
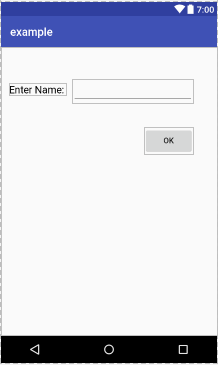
Design screen
And another textview below OK button. It should be empty (no text).
If you don’t like this drag and drop option, you can always go for coding. Go to your layout folder and open the layout file for this activity. It is in xml. It automatically updates when you use drag and drop interface. Here is how it looks now.
<?xml version="1.0" encoding="utf-8"?>


<LinearLayout android:layout_width="368dp"
    android:layout_height="495dp"
    xmlns:tools="http://schemas.android.com/tools"
    android:orientation="horizontal"
    tools:layout_editor_absoluteX="8dp"
    tools:layout_editor_absoluteY="8dp"
    android:weightSum="1"
    xmlns:android="http://schemas.android.com/apk/res/android">

    <RelativeLayout
        android:layout_width="390dp"
        android:layout_height="509dp">

        <TextView
            android:id="@+id/textView4"
            android:layout_width="wrap_content"
            android:layout_height="wrap_content"
            android:layout_alignParentLeft="true"
            android:layout_alignParentStart="true"
            android:layout_alignParentTop="true"
            android:layout_marginLeft="13dp"
            android:layout_marginStart="13dp"
            android:layout_marginTop="104dp"
            android:text="Enter Name:"
            android:textColor="@android:color/black"
            android:textSize="24sp" />

        <EditText
            android:id="@+id/editText4"
            android:layout_width="wrap_content"
            android:layout_height="wrap_content"
            android:layout_marginLeft="11dp"
            android:ems="10"
            android:inputType="textPersonName"
            android:text="Name"
            android:layout_alignBaseline="@+id/textView4"
            android:layout_alignBottom="@+id/textView4"
            android:layout_toRightOf="@+id/textView4"
            android:layout_toEndOf="@+id/textView4"
            android:layout_marginStart="11dp" />

        <Button
            android:id="@+id/button3"
            android:layout_width="wrap_content"
            android:layout_height="wrap_content"
            android:layout_alignEnd="@+id/editText4"
            android:layout_alignRight="@+id/editText4"
            android:layout_below="@+id/editText4"
            android:layout_marginEnd="41dp"
            android:layout_marginRight="41dp"
            android:layout_marginTop="46dp"
            android:onClick="ShowMessage()"
            android:text="OK" />

        <TextView
            android:id="@+id/textView5"
            android:layout_width="wrap_content"
            android:layout_height="wrap_content"
            android:layout_alignLeft="@+id/editText4"
            android:layout_alignStart="@+id/editText4"
            android:layout_below="@+id/button3"
            android:layout_marginTop="56dp"
            android:textColor="@android:color/black"
            android:textSize="24sp" />
    </RelativeLayout>
</LinearLayout>
Write code in java class
Now open MainActivity.java and add an action listener to your button.
Here is how to add action listener.
package com.example.admin.example;

import android.support.v7.app.AppCompatActivity;
import android.os.Bundle;
import android.view.View;
import android.widget.Button;
import android.widget.EditText;
import android.widget.TextView;

public class MainActivity extends AppCompatActivity {


    Button  button = null;
    TextView textView = null;
    EditText editText = null;
    @Override
    protected void onCreate(Bundle savedInstanceState) {
        super.onCreate(savedInstanceState);
        setContentView(R.layout.activity_main);

        button = (Button)findViewById(R.id.button3);
        textView = (TextView) findViewById(R.id.textView5);
        editText = (EditText) findViewById(R.id.editText4);
        final String name = editText.getText().toString();
        button.setOnClickListener(new View.OnClickListener() {
            public void onClick(View v) {
            textView.setText("Hello "+name+"\nWelcome to JavaTutorial");
            }
        });
    }
}
Here are the screen shots how it works.
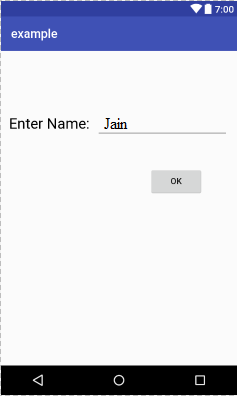
Application screen
When user clicks on OK button, action listener will execute and it will say welcome.
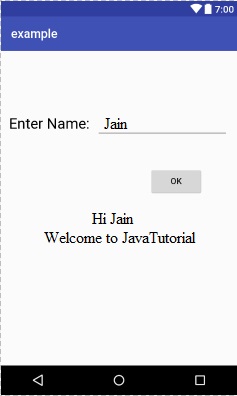
Application screen
Go through this tutorial and start making your first app today. You can download complete project from this link.
I am unable to get output on clicking the button in a Samsung J7 in USB
It doesn’t work for me … it simply doesn’t write the inserted string (name). Can someone helps?
write code is below:
button.setOnClickListener(new View.OnClickListener() {
public void onClick(View v) {
final String name = editText.getText().toString();
textView.setText(“Hello “+name+”\nWelcome to JavaTutorial”);
}
});
Check the 24th line. It is in the wrong place.
Only after someone click; the text from the box should be assigned to “name” string.
What you can do is cut that 24th line and paste it between 26th and 27th line. It should work
Very nice bro, thank you! 🙂