Before proceeding with the next steps, make sure you have JDK and Maven installed on your system.

If you don’t have JDK installed, click here.
If you don’t have Maven installed, click here.
1. Generating a WAR file using Eclipse
Step 1 – Open Eclipse and create a new Maven project (File->New->Other->Maven Project)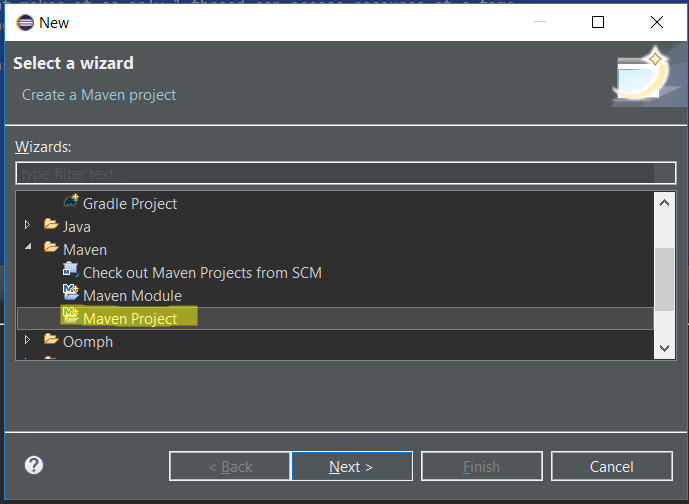
Step 2 – After you have created the Maven Project, click on Next on the new Window, like so: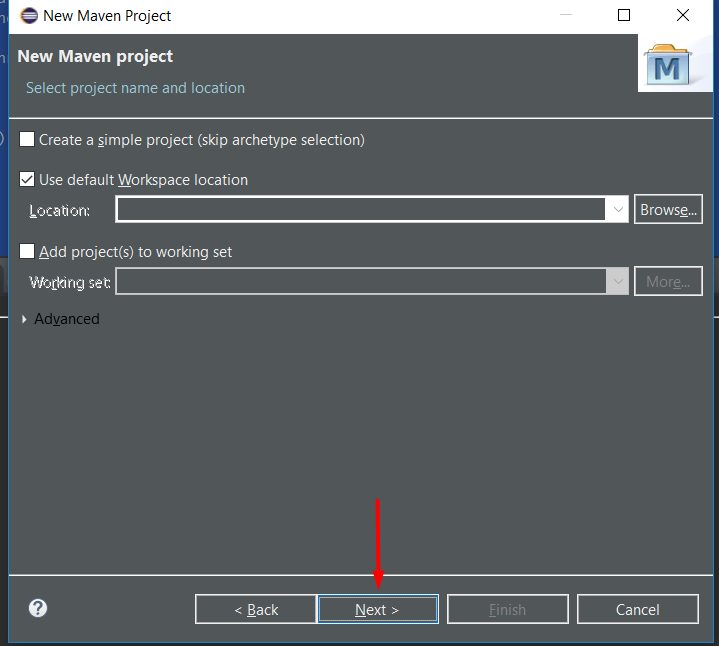
Step 3 – Select maven-archetype-webapp and click Next like so:
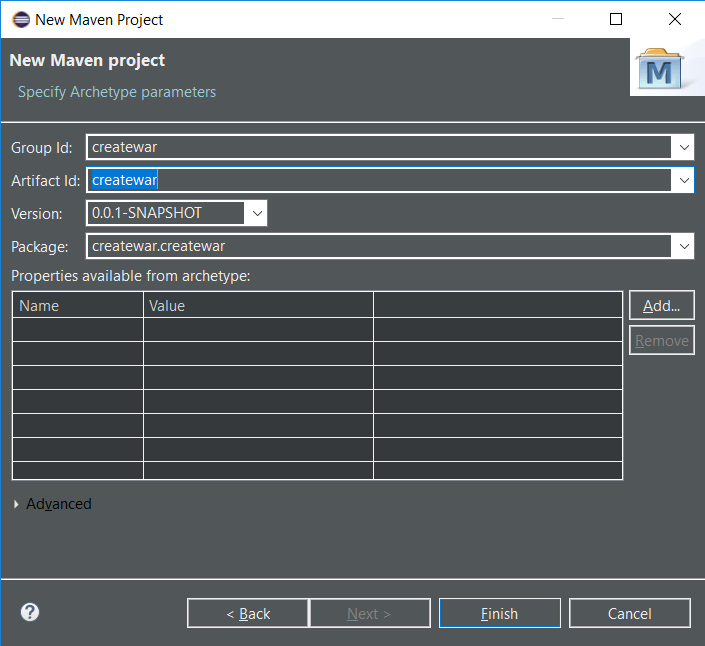
Step 4 – Enter details, like for example mine, and click on finish
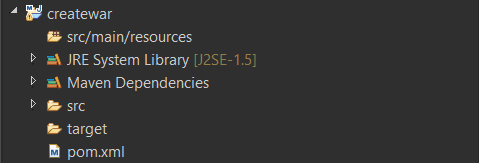
Your Maven project directory should look similar to this:
and the pom.xml should look similar to this:
<project xmlns="http://maven.apache.org/POM/4.0.0" xmlns:xsi="http://www.w3.org/2001/XMLSchema-instance"
  xsi:schemaLocation="http://maven.apache.org/POM/4.0.0 http://maven.apache.org/maven-v4_0_0.xsd">
  <modelVersion>4.0.0</modelVersion>
  <groupId>createwar</groupId>
  <artifactId>createwar</artifactId>
  <packaging>war</packaging>
  <version>0.0.1-SNAPSHOT</version>
  <name>createwar Maven Webapp</name>
  <url>http://maven.apache.org</url>
  <dependencies>
    <dependency>
      <groupId>junit</groupId>
      <artifactId>junit</artifactId>
      <version>3.8.1</version>
      <scope>test</scope>
    </dependency>
  </dependencies>
  <build>
    <finalName>createwar</finalName>
  </build>
</project>
Step 6 – Replace the pom.xml with the following code:
<project xmlns="http://maven.apache.org/POM/4.0.0" xmlns:xsi="http://www.w3.org/2001/XMLSchema-instance"
	xsi:schemaLocation="http://maven.apache.org/POM/4.0.0 http://maven.apache.org/xsd/maven-4.0.0.xsd">
	<modelVersion>4.0.0</modelVersion>
	<groupId>CrunchifyTutorial</groupId>
	<artifactId>CrunchifyTutorial</artifactId>
	<version>0.0.1-SNAPSHOT</version>
	<packaging>war</packaging>
	<build>
		<sourceDirectory>src</sourceDirectory>
		<plugins>
			<plugin>
				<artifactId>maven-compiler-plugin</artifactId>
				<version>3.1</version>
				<configuration>
					<source>1.7</source>
					<target>1.7</target>
				</configuration>
			</plugin>
			<plugin>
				<artifactId>maven-war-plugin</artifactId>
				<version>2.4</version>
				<configuration>
					<warSourceDirectory>WebContent</warSourceDirectory>
					<failOnMissingWebXml>false</failOnMissingWebXml>
				</configuration>
			</plugin>
		</plugins>
	</build>
	<dependencies>
		<dependency>
			<groupId>javax.servlet</groupId>
			<artifactId>servlet-api</artifactId>
			<version>2.5</version>
		</dependency>
	</dependencies>
</project>
The most important lines are:
<packaging>war</packaging>
and:
<artifactId>maven-compiler-plugin</artifactId>
That’s where we are effectively making it converted to WAR.
Step 7 – Right click on Project->Run As->Maven build…:
Step 8 – type clean install in the Goals section and click run, like so: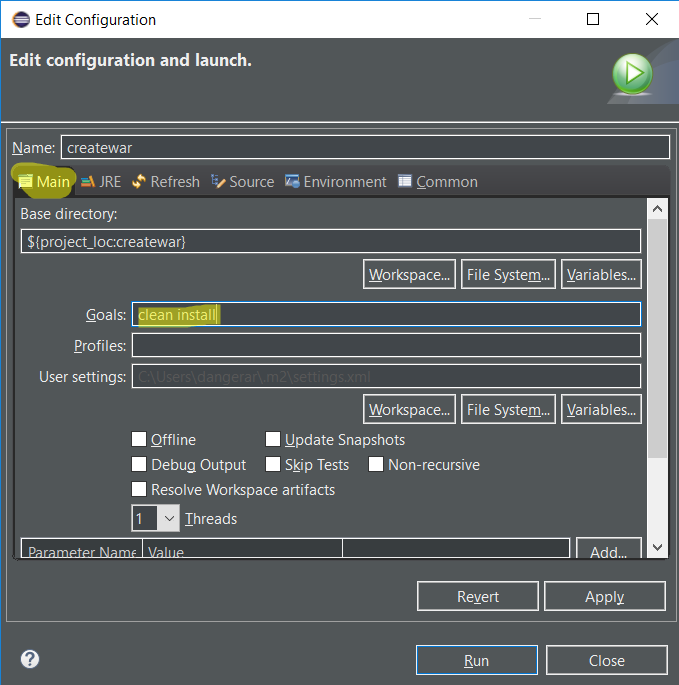
Step 9 – You should see BUILD SUCCESS, like so: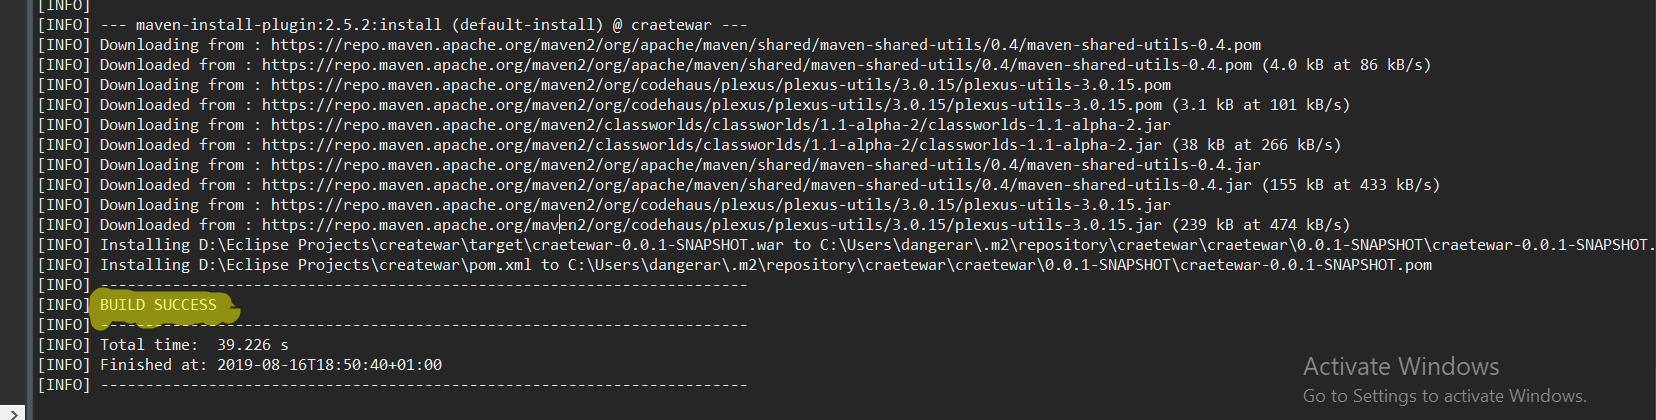
Congratulations! You have got your .war file.

Generating a WAR file using CMD
Step 1 – modifying pom.xml file by adding compiler where we have java installed.
pom.xml
<project xmlns="http://maven.apache.org/POM/4.0.0" xmlns:xsi="http://www.w3.org/2001/XMLSchema-instance" xsi:schemaLocation="http://maven.apache.org/POM/4.0.0 http://maven.apache.org/xsd/maven-4.0.0.xsd">
  <modelVersion>4.0.0</modelVersion>
  <groupId>craetewar</groupId>
  <artifactId>craetewar</artifactId>
  <version>0.0.1-SNAPSHOT</version>
  <packaging>war</packaging>
  <name>craetewar</name>

   <parent>
        <groupId>org.springframework.boot</groupId>
        <artifactId>spring-boot-starter-parent</artifactId>
        <version>1.5.2.RELEASE</version>
    </parent>
   <dependencies>
		<dependency>
			<groupId>org.springframework.boot</groupId>
			<artifactId>spring-boot-starter-web</artifactId>
		</dependency>
    </dependencies>


  <build>
  <finalName>createwarexample</finalName>
   <plugins>
       <plugin>
            <artifactId>maven-compiler-plugin</artifactId>
            <version>3.1</version>
			<configuration>
			<fork>true</fork>
			<executable>C:\Program Files\Java\jdk1.8.0_211\bin\javac.exe</executable>
			</configuration>
        </plugin>
    </plugins>
   </build>

</project>
Note: the <executable> is the important part. Your java version might be different, make sure you keep that in mind and put the correct folder path.
Step 2 – Navigate to the projcet’s folder path in the terminal, mine for example is:

Step 3 – Run mvn clean install which will be responsible for creating the war file:

There is our WAR file:

That’s it! We’ve managed to generate a war file both using Eclipse and the Terminal.
In case you are interested in generating a JAR file, I already have an article for the topic. You can follow it by clicking here.